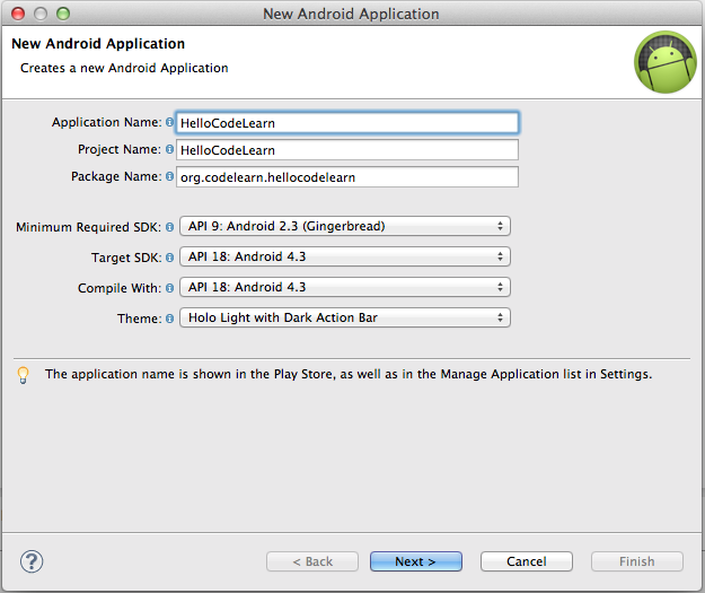
 Making Project From Wizard Not at all like different dialects where you have to compose code to run an essential hi world program, the Android Developer Tool (ADT) or Eclipse gives us an extraordinary approach to make android applications utilizing wizard. In Android, you simply need to take after some basic steps and with a couple of clicks we get our first Android hi world extend up and running. This excercise will help you comprehend our procedure and different alternatives in the wizard. On the off chance that you haven't introduced the ADT or obscuration plugin, please go to excercise 2 and complete your setup. Okay , Let's Start then ! In the event that ADT is not running, twofold click on ADT to begin the improvement environment. Once the ADT is propelled, after these steps: Click on File -> New and pick Android Application Project, you will see the first screen as Screen 1 Android Hello World new application This is the first Screen for making another android venture. We should cover each one field demonstrated above independently and attempt to comprehend their vitality. Application Name: application name is only the name of your application. This name is unmistakable on the screen when the application is introduced. The application name is additionally indicated in Google Play Store when you transfer your application. Venture Name: Project name is the name of your extend that gets made in shroud. You can give any name to your task. Bundle Name: This is essential. Bundle name is utilized to interestingly distinguish your application on Play Store. You ought to take after the java bundle tradition for the bundle name . The bundle name is not indicated to the client however ought not change ever. A decent approach to pick bundle name is to utilize the opposite of your organization space name. Case in point in codelearn, the url is codelearn.org so the perfect bundle name would be org.codelearn.android Min Required SDK: As you may know, Android began with rendition 1.5 and its present form is 4.4. These numbers speaks to distinctive kinds of Android, in the same way as 2.3 is termed Gingerbread, 4.1 as Ice Cream Sandwich and so forth. These names are utilized for showcasing the OS, while rendition numbers are of enthusiasm to engineers. Min Required SDK field provides for you the adaptability to choose which form of android at least you need to backing. Case in point, on the off chance that you make an application for android 2.3 it will chip away at android 4.4. By and large, it is fitting to have least backing of 2.3.3 API Version 9. Target SDK: This setting tells android that despite the fact that your application will have the capacity to run on its past android rendition, however it is unequivocally tried with form indicated here in this field. Accumulate With: This choice gives you a chance to pick the variant of SDK you need to gather with. Typically,the most astounding variant which is accessible in your ADT ought to be picked here. This will arrange your application with the most recent code and enhancements. Topic: If you are making applications for form 4.x or more you can have an application wide subject. These topics are only some predefined shade plans, which you can use to enhance your application's User Interface. When you transfer an application to the Play Store, you can't transform its bundle name. So pick your bundle name shrewdly 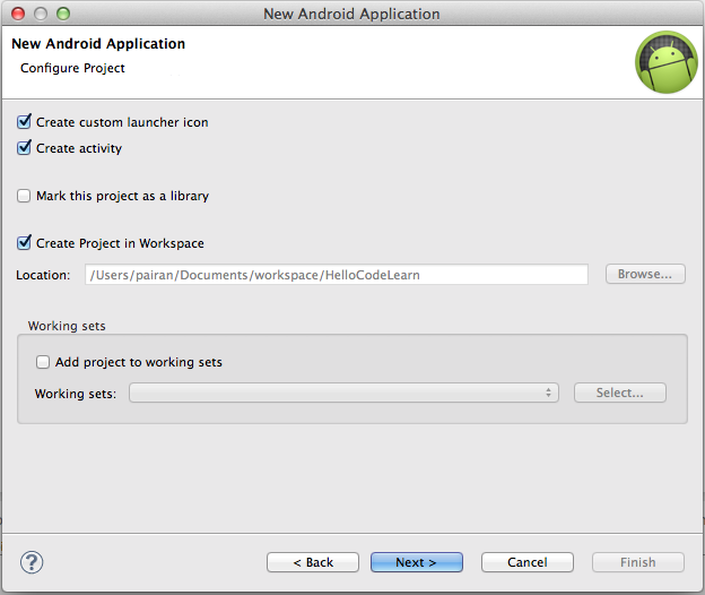 This screen is utilization to arrange different task settings, gives up 1 by 1 to see all these choices Make Custom Launcher Icon: Do you recollect how you dispatch an android application ? Actually, we do so by clicking on the application symbol. This symbol is only the launcher symbol. On the off chance that this alternative is checked ADT will give you a wizard to make a launcher symbol. Keep this choice chose. Make Activity: With this choice chose, ADT will make first action for you, this will be your principle movement and will have a reference in mainifest. In later sections, you will get to realize what fundamental action is, however just to concise you - the majority of the android applications are fabricated with different exercises, yet at whatever point you open any application it generally begins with the same movement which is termed as your primary movement. Through this activity,you tell the Android OS that out of all these exercises from my application, open this specific action at whatever point the application begins. Mark This undertaking as Library: Any android task can be of 2 sorts, library venture or a non library venture. A library undertaking is a reusable task which is utilized by other non library ventures. Library venture can't be introduced. They're not quite the same as JAR documents in that library tasks can contain assets and resources. Make Project in Workspace: When you open Eclipse/ADT surprisingly, it requests that you pick a workspace. Workspace is only an area on your hard circle where all your undertakings will be spared. With this checkbox chose, you are advising ADT to spare this undertaking in the current area. On the off chance that you need to store your android venture at some other area you can uncheck this alternative and select your own particular way to spare the application Add Project to working sets: When you begin working in diverse activities, your overshadowing/ADT workspace will have a great deal of undertakings. So it is hard to take a shot at another or existing task, as you need to span down on an enormous rundown of undertakings, which you are not by any means working with. To settle this issue Eclipse has a fantastic idea of working set. Working Set can be utilized to Group Similar activities together. At the point when your number of activities in ADT begins expanding, you can bunch them together into working sets to abstain from seeing all tasks while working. You can without much of a stretch switch between distinctive working sets without restarting shroud.
0 Comments
Leave a Reply. |
AuthorWrite something about yourself. No need to be fancy, just an overview. Archives
January 2015
Categories
|
 RSS Feed
